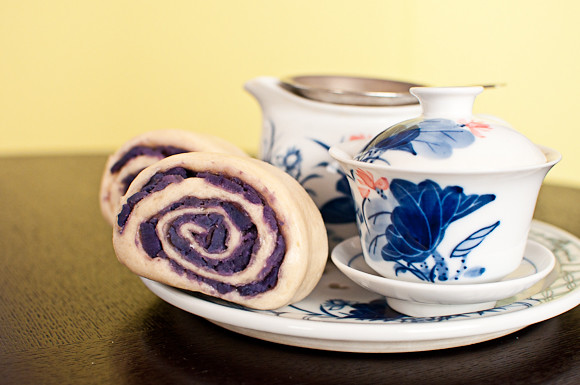
Aren't they beautiful? No color added! This is the true color of purple yam!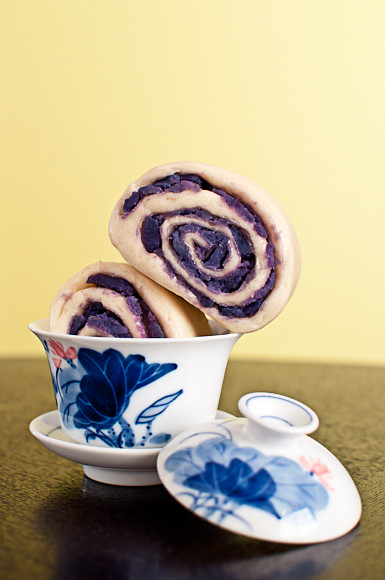
Showing posts with label recipe.chinese. Show all posts
Showing posts with label recipe.chinese. Show all posts
Friday, October 15, 2010
Steamed purple yam roll 紫薯扭紋饅頭
Thursday, September 09, 2010
Chinese steamed buns mania
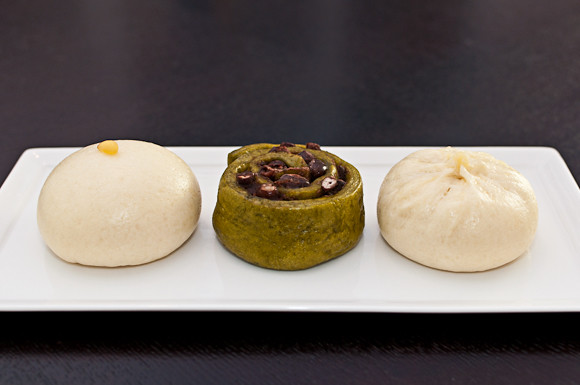
Left to right: Sweet steamed bun with pine nut filling, matcha and azuki bean roll and savoury steamed bun with pork filling.
These are thank you gifts for my coworkers. It's a long story. I purchased some baking tools from a Japanese website and mailed to my Japanese coworker's parents address in Japan. Original plan was to have my coworkers to bring them back when she went back to Japan, but her super nice parents actually mailed it to her before that, so I owed them a even bigger favour!
I especially made them with something that Japanese like: Matcha and Azuki beans (Green tea and red bean), pork stuffing and pine nuts.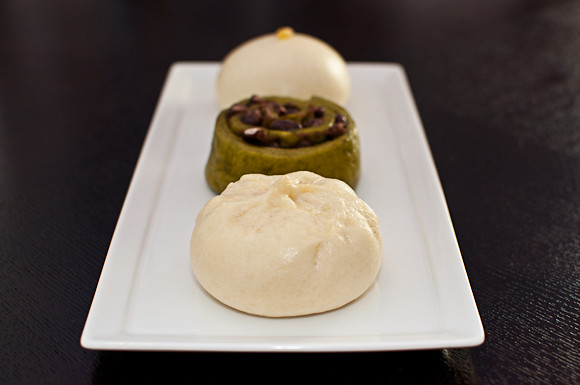
Saturday, September 04, 2010
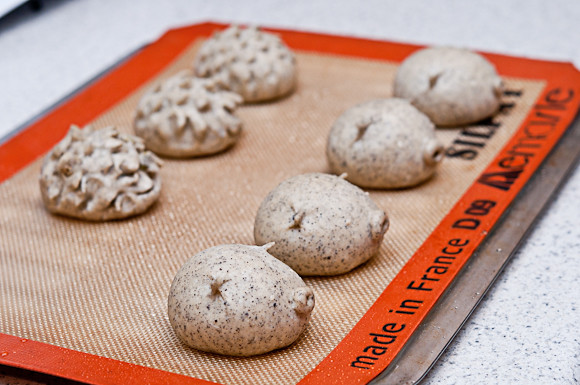
Black sesame piggy buns
Piggy buns are back!
Adding Porcupine buns to the mix this time :)
As you all know, I love black sesame, so you won't be too surprise that to find them in these buns, right?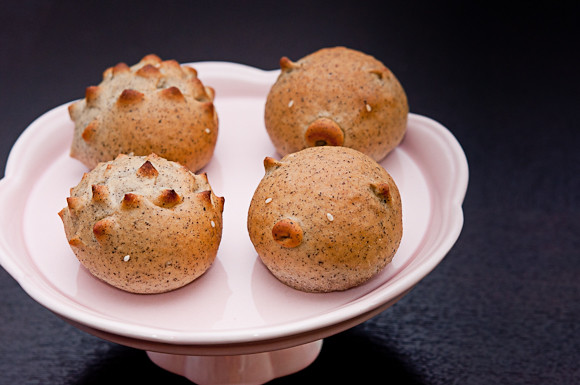
Tuesday, May 18, 2010
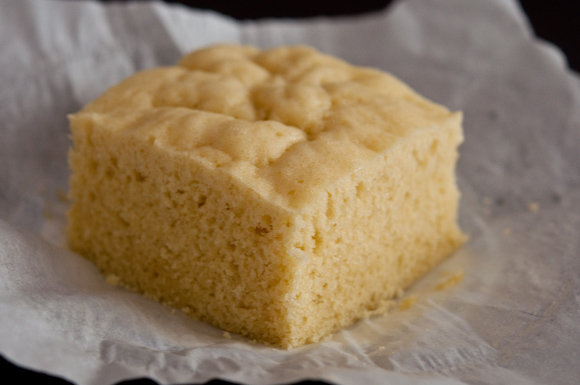
Malay cake / Ma Lai Go (traditional method) 古法馬拉糕
I miss 蓮香樓/居。真是巴閉,尤記得上次我可是足足等了3籠才搶到一碟馬拉糕到手呢!不過又真係巴閉得起喎!吃完之後有感動喔!
之前我試做過2次:第1次,完全失敗;第2次,貌似味不似。經過上兩次的失敗,這次我認真的跟它撩下去下去了!花了2天作發酵4次的麵種,作成需時4日的古法馬拉糕。今次終於有點睇頭,色香味都不錯,本小姐給它80分!不過還有可改進的空間,同志還需努力哩~~~
古法馬拉糕
9"圓模
:麵種:
參考至麵種的誕生by小三看天下
麵粉 // 38g
清水 // 19g
1. 第一天:搓揉成麵團,蓋上保鮮膜,發酵 24 小時。
2. 第二天:將麵團的1/2或1/3分量棄掉,餘下的麵團+麵粉38g+清水19g搓揉成麵團,發12~16小時。
3. 第三天:將麵團的1/2或1/3分量棄掉,餘下的麵團+麵粉38g+清水19g搓揉成麵團,發12~16小時。
4. 第四天:將麵團的1/2或1/3分量棄掉,餘下的麵團+麵粉38g+清水19g搓揉成麵團,發12~16小時後,化身成中國娃娃--已發酵麵種。
:馬拉糕:
A:
麵種 // 204g
糖 // 204g
蛋 // 3
吉士粉 // 22g
奶粉 // 38g
高筋麵粉 // 34g
淡奶 // 少許
B:
泡打粉 // 8g
鹼水 // 1/2 tsp
菜油 // 20g
牛油,溶化 // 20g
1. 將A料中麵種和糖打滑,攪至糖溶化,分次加入蛋,再加入麵粉,吉士粉,奶粉,淡奶打勻混合。
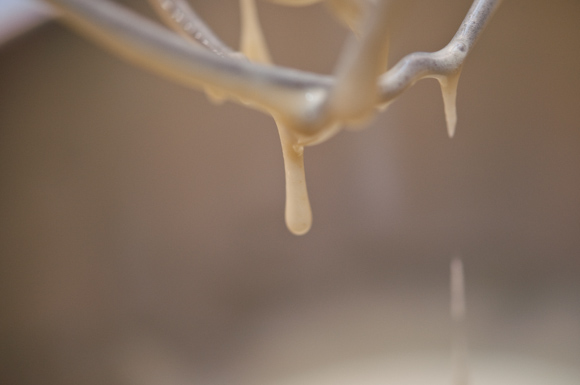
2. 攪妥成蛋漿後,用布或保鮮紙蓋著,待發酵一夜(從用眼看發至2倍以上為準,如冬天時間側要較長),使雞蛋粉漿發酵成熟,這樣糕蒸出來會較滑。
3. 第2天用少量麵種糊加入泡打粉攪勻,再將兩者混合攪勻麵糊。加入梘水攪勻(麵糊明顯已轉色),再逐少加入熱牛油及菜油攪至滑身。
4. 篜盆鋪紙掃油,用大火蒸25-30分鐘即成。Malay cake / Ma Lai Go
9" round cake
:starter dough:
revised from麵種的誕生by小三看天下
Flour // 38g
Water // 19g
1. Day 1: Combine the ingredients into a dough, covered with plastic wrap and let rise for 24 hours.
2. Day 2: Throw away 1/2 or 1/3 of the dough, combine the remaining dough with 38g flour + 19g water. Let rise for 12-16 hours.
3. Day 3: Throw away 1/2 or 1/3 of the dough, combine the remaining dough with 38g flour + 19g water. Let rise for 12-16 hours.
4. Day 4: Throw away 1/2 or 1/3 of the dough, combine the remaining dough with 38g flour + 19g water. Let rise for 12-16 hours. Now the starter dough is completed.
:Ma lai go/ Malay cake:
A:
Starter dough // 204g
Sugar // 204g
Eggs // 3
Custard powder (or pudding mix) // 22g
Milk powder // 38g
Bread flour // 34g
Evaporated milk // A little bit
B:
Baking powder // 8g
Akaline Water // 1/2 tsp
Vegetable oil // 20g
Butter, melt // 20g
1. Combine starter dough and sugar until sugar are dissolved. Add in eggs, one at a time, then mix in flour, custard powder, milk powder and evaporated milk.
2. Pour the egg mixture into a large bowl, covered with plastic wrap and let rise for a night or until double in volume.
3. Next day, combine scrap a little bit egg mixture into a small bowl, mix in baking powder to combine. Fold back into the remaining egg mixture. Add akaline Water, mix to combine. Add in melt butter and vegetable oil, fold to combine.
4. Place parchment paper around inside a pastry ring or cake pan, then brush the bottom and the side with oil, steam the egg mixture with high heat for 25~30 minutes.
:note:
1. Akaline Water can be bought in Chinese grocery store like Ranch99.
Monday, May 03, 2010
傳說中的狀元糕: 迷你版 The mini champion cake
(以下為迎合此傳統的古樸小吃,鄙人將嘗試把此文寫得文雅一點,看不懂的別打在下呀!)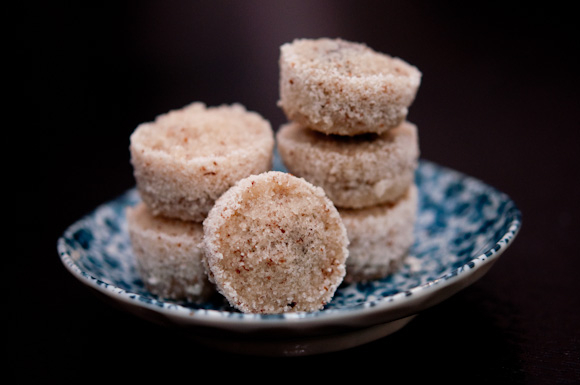
狀元糕,中國小吃之一。狀元糕相傳是由中國糕點「廣寒糕」演變而來,歷史可遠溯自南宋時期,之所以稱為狀元糕,是因為販賣的成品貌似狀元帽子,因以為名。
狀元糕其名稱由來還有一種說法,即古代有一個書生,赴京趕考,因在半途上盤纏用盡,於是就在京城街上用幾個簡單的木製筒倒入芝麻、花生粉等原料,做起了製糕的生意,後來這個書生終於考上狀元,一日皇上親自拜訪狀元郎,狀元郎一下子心急不知道要用什麼招待皇上,於是就拿出了當年製糕掙錢的工具,將當年自創的糕仔做給皇上吃,皇上吃了龍心大悅並賜封為狀元糕。
一直知道狀元糕這款民間小吃,卻一直停留在”久聞”的狀態,未有機會見識一番。今次無意中尋得食譜,怎說也得做做看吧!?
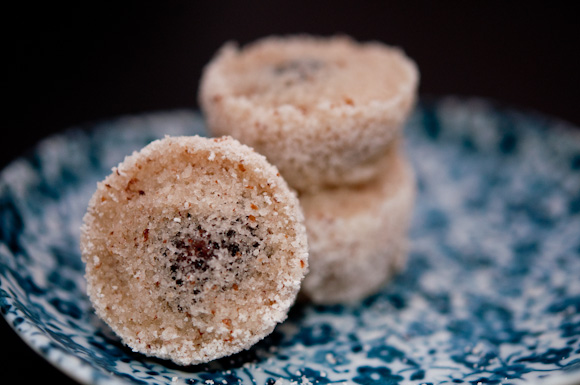
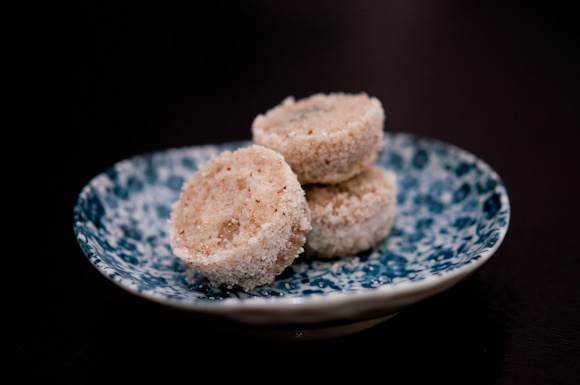
如今一試,方知狀元糕其實是迷你版的有餡鬆糕,通常裡面夾一小塊黑芝餡或花生餡。原來狀元糕是這樣子的呀!就味道而言,鄙人很喜歡那帶米香的軟糯口感,剛蒸好熱騰騰時吃更是一絕。(Gluten-free喔!)
狀元糕
24個迷你版狀元糕by周老師的美食教室
白砂糖 // 30g
水 // 140g
糯米粉 // 200g
杏仁粉 // 50g
花生餡:
鹹花生醬 // 35g
糖粉 // 20g
芝麻餡:
黑芝麻粉 // 20g
糖粉 // 20g
固體菜油(Shortening) // 1tbsp
1. 糖加水溶化,加糯米粉和杏仁粉拌勻,用手搓到完全均勻,放置一小時,過篩。因為粉是溼的,所以要把粉糰放在篩子上磨擦才能過篩。篩過就不要再壓到。
2. 把做餡的糖粉都過篩,加其它材料拌勻即成兩種餡,各分成6小塊。
3. 把1/3的粉舀入杯中,排在蒸籠裡。
4. 蒸鍋裡煮沸小半鍋水,上籠用中火蒸5分鐘。
5. 開蓋,把餡放在中間,把另 2/3的粉輕輕撒在周圍。
6. 蓋上再蒸5分鐘即可。
:note:
1. 這次用上mini muffin模作成一啖一個的迷你版。入模前掃油,脫模時先用牙籤順模的型狀沿邊劃一下,再用手指輕輕壓開邊位置順勢脫模。用普通Muffin cup也可以,更方便喔!
mini champion cake (gluten-free & vegan!)
24 mini-muffin size rice cakeSugar // 30g
Water // 140g
Glutinous rice flour // 200g
Almond flour // 50g
Peanut butter filling:
Peanut butter sauce // 35g
Powdered sugar // 20g
Black sesame filling:
Black sesame, grounded // 20g
Powdered sugar // 20g
Shortening // 1tbsp
1. Melt sugar with water in a large bowl. Add glutinous rice flour and almond flour, combine by hands. Set aside for an hour, then sift through a sieve (The mixture will be like a damp coarse meal or even dough like, force them through the sieve to create coarse flour).
2. Fillings: Sift the powdered sugar, add in the remaining ingredients, divide and form into 12 small ball-like dough.
3. Fill each muffin mould with coarse flour to halfway fill, place the muffin pan into steamer.
4. Steam them at medium heat for 5 minutes.
5. Remove the steamer cover, place the filling ball in the middle, then fill in the rest coarse flour.
5. Cover the steamer and steam for 5 minutes.
:note:
1. I used mini muffin pan to create these one bite mini champion cake. Grease the muffin pan with oil before fill in the coarse flour. To remove from pan, use a tooth pick to draw around the edge of muffin mould, then gently press the edge with finger to help removing from the mould. You can also use regular muffin cup, that way you don't need to worry about removal!
Sunday, March 28, 2010
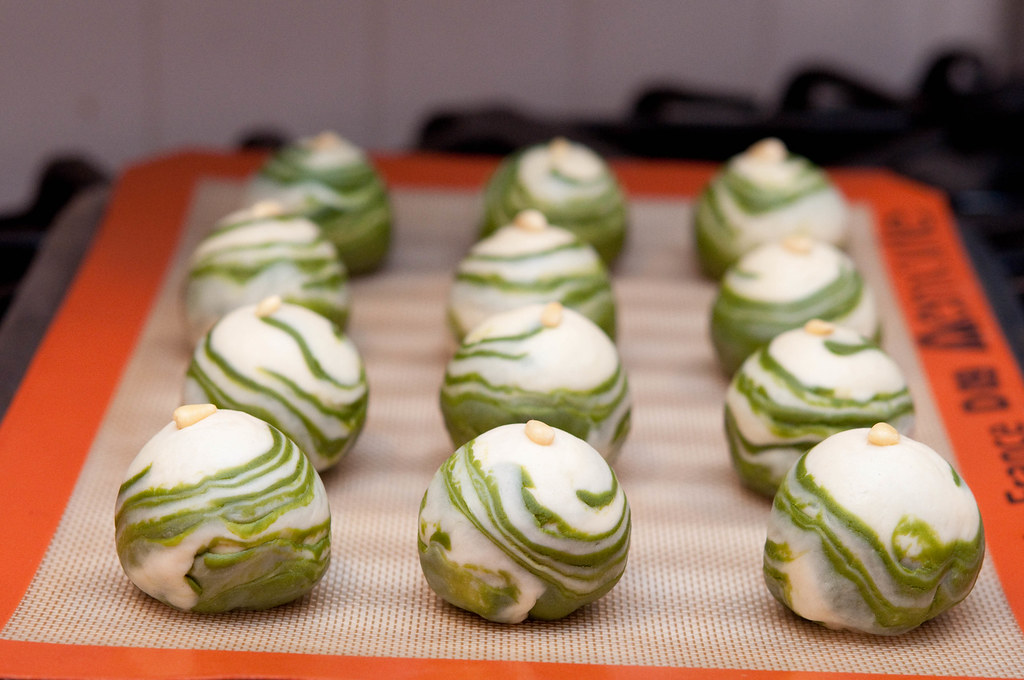
Little jade planets: matcha taro puff pastries
抹茶芋頭酥
Swirl mania! Don't they look like little planets?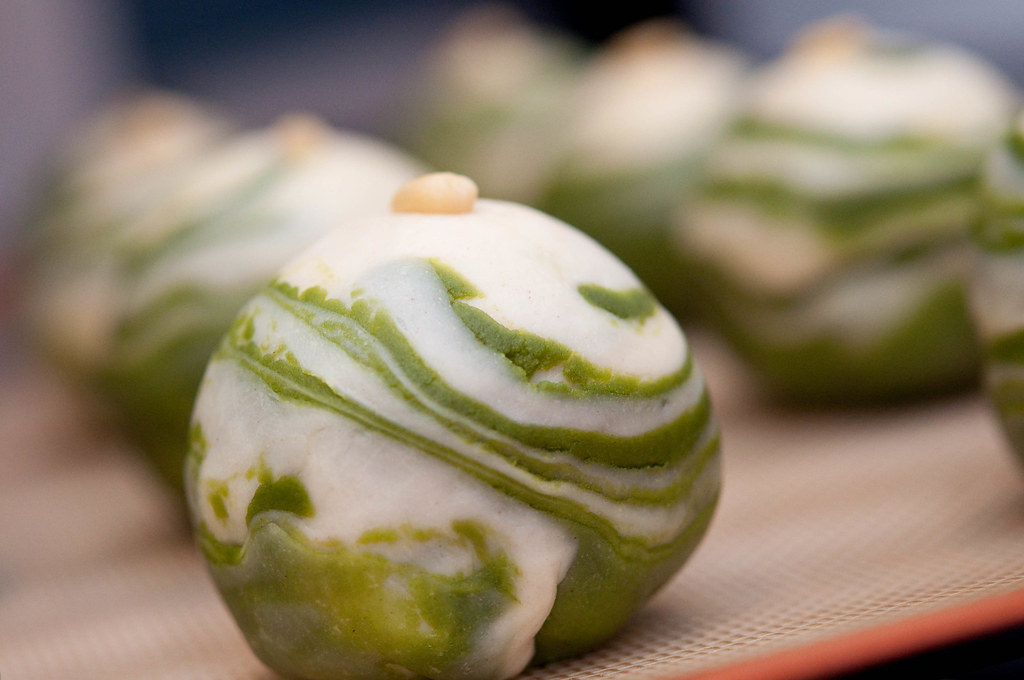
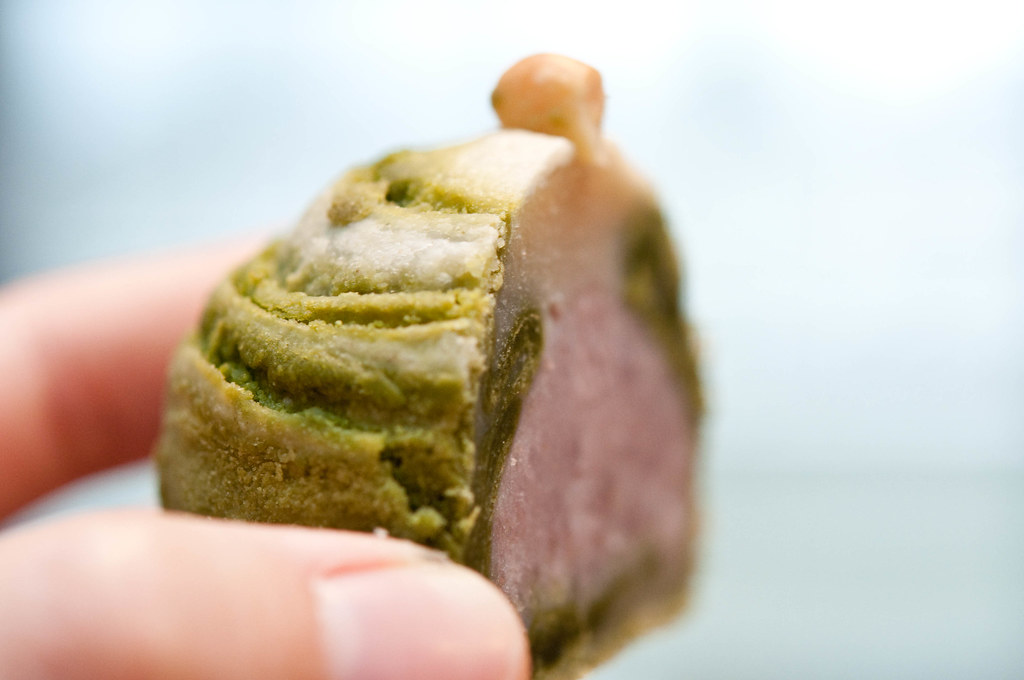
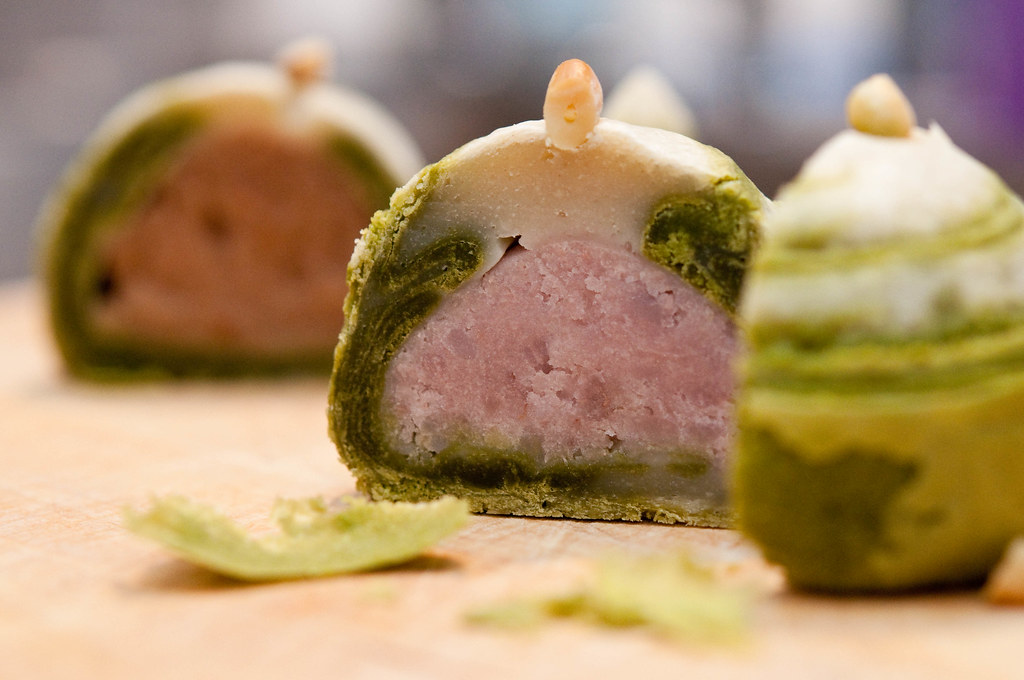
These are traditional Chinese puff/flaky pastry (酥皮), often stuffed with sweet fillings such as sweet bean paste and taro or savory fillings. In a way it's like Chinese steamed bun but with flaky crust...ha! These pastry varies from region to region throughout China, but when talking about these flaky pastries, two styles come in mind: the Su-style and Cantonese style. In the region of Suzhou, mooncakes are made of these puff pastry while these puff pastries are often stuffed with sweet filling in Canton region.
Unlike pâte feuilletée (French puff pastry), the Chinese puff pastry dough are quite easy to make and require not as much preparation time. See my another post onthe hard working pastries 勤勞的酥皮 1 : 蘿蔔絲酥餅 for process photos.
Matcha Taro Puff Pastry
1 dozen
- Recipe coming tonight , stay tuned! -
Tuesday, March 16, 2010
Stripe mania: stuffed steamed bun
More steamed buns :D
These savoury steamed buns are stuffed with pork and shitaki mushrooms. Try stuffed with chicken and corn or make vegan-friendly version with mushrooms and tofu.

This time the strips look so nice and I am very happy with it..... but my cousin said he thought it's a molded bread when he first saw the thumbnail of the black sesame buns photo......can someone please give him a good slap for me? Thank you very much!
Recipe see Pork and pumpkin stuffed steam bun 南瓜肉包子
Sunday, February 14, 2010
Chinese New Year
Kung hei fat choi! It's Chinese new year!!! The first day of Chinese new year this year is actually Sunday, no work YEAH!
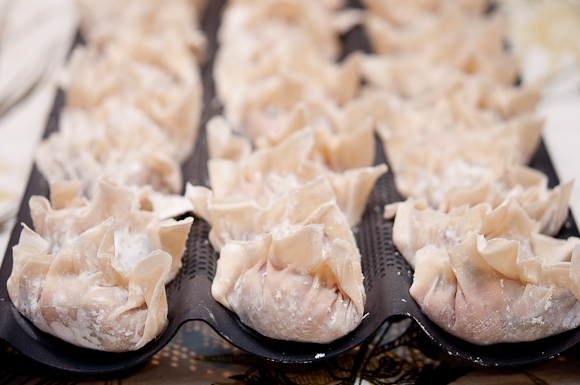
We had a little Chinese new year-ish lunch/gathering at our place on Saturday. I made the 蘿蔔糕 (The savoury turnip cake, everyone's favourite!), 馬蹄糕(watercrestnut cake) and dumplings. 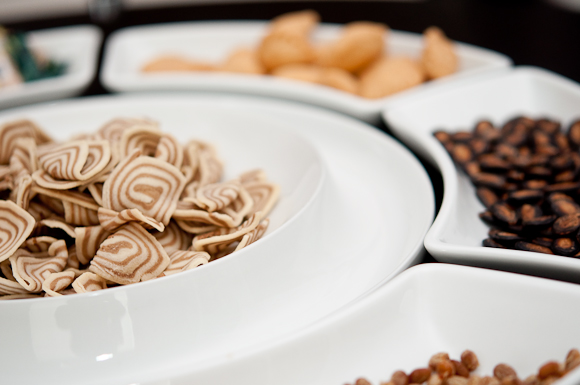
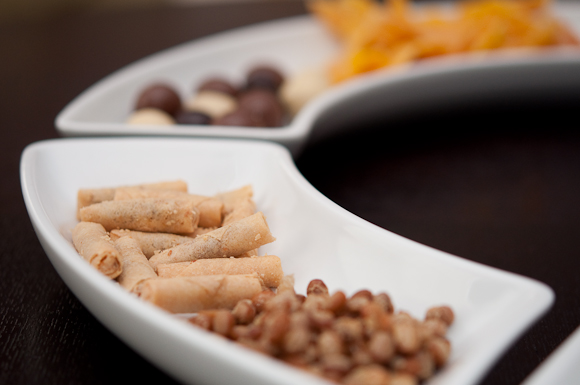
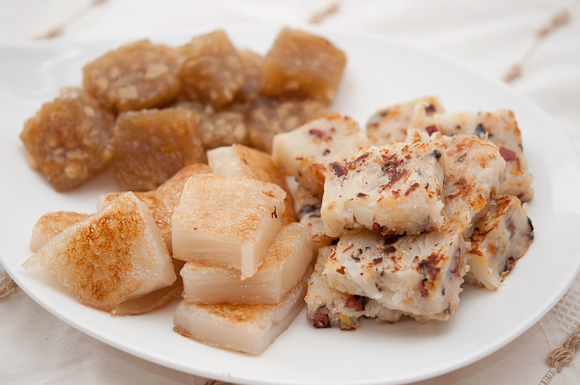


蘿蔔糕
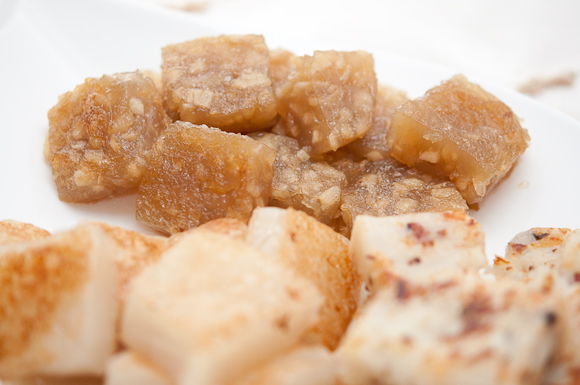
馬蹄糕
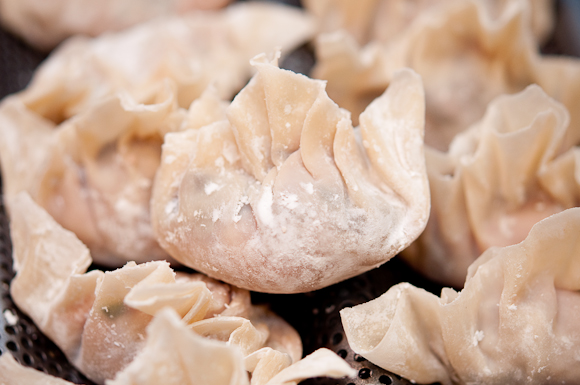
水餃
Saturday, November 14, 2009
Steamed goodies: swirly steamed rolls fever 旋風饅頭狂熱
Last weekend we went to two house warming parties, one in Seattle, one in Vancouver!
House warming gift? Hmm....how about some baked goodies!!? In a day, I made caramel walnut chocolate chip cookies, a bunch of steamed rolls and a fancy apple pie!
As a result my Saturday was like this: woke up, made the pie shell, went out for lunch, came home baked some cookies while waiting for the steamed rolls doughs to raise, made the apple pie filling and sent the pie to bake, steamed the rolls while waiting!
The steam rolls came out good! It's soft but still chewy! Plus, I finally figured it out how to make two different flavours at a time! Woohoo!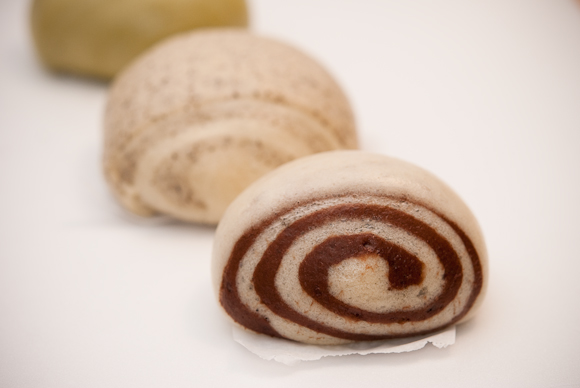

I had tried to roll as thin as possible and hope make more thin layers, but seems like it is impossible to do that by hands! My arms were sore afterward T_T I guess I need a pasta machine.....hmmmmm XD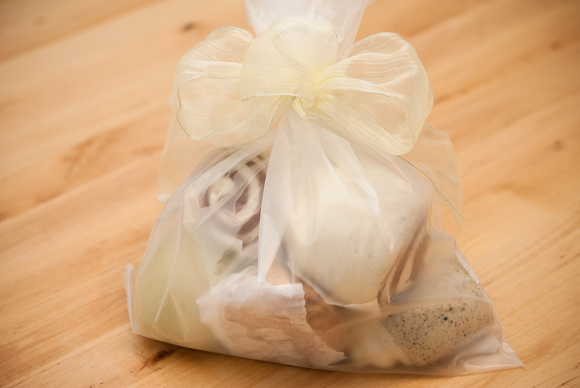
House warming gift for our Vegan friend!Swirly steamed roll
10 pieces
: starter dough :
All purpose flour // 200g
Dry active yeast // ½ tsp
Water // 100g
Salt // 1/8 tsp
1. Combine everything until the dough is smooth and not sticky. Let it rise in room temperature for 8 hours.
2. The starter dough can be chilled in the refrigerator for 1~2 days or freeze for 1 month.
:note:
1. I usually divide the start dough into 70g a piece (shape into a ball) and store in the freezer, pretty handy when you want to make a quick steam buns.
: Steam roll :
Starter dough // 70g
All purpose flour // 300g
Sugar // 30g
Water // 180g
Dry active yeast // 5g
Butter // 5g
Soymilk powder // 2 tbsp
:Flavouring:
Cocoa /Black sesame powder // 3 tbsp
Water // 1~1½ tsp
1. Combine everything(except starter dough & oil) in a mixing bowl, mix until a dough is formed. Add in starter dough, mix until combined. Add in oil, mix until fully absorbed by the dough.
2. Divide the dough into half. Add in the flavouring into one of the doughs. Shape the doughs into balls. Let rise for 20 minutes.
3. Roll and fold both of the doughs at least 6 times. Roll out one last time, around 0.3cm thickness, let rest for 3 minutes. Place the flavoured dough sheet on top of the plain dough sheet. Roll them up, slightly stretch the dough a little bit longer and sliced into equal pieces(roughly less than 2").
3. Let it rise for another 40 minutes or until doubled it size.
4. Steam the rolls for 10-13 minutes over low-medium heat. Turn off the heat and do not open the cover, let it sits for another 2 minutes before taking the rolls out.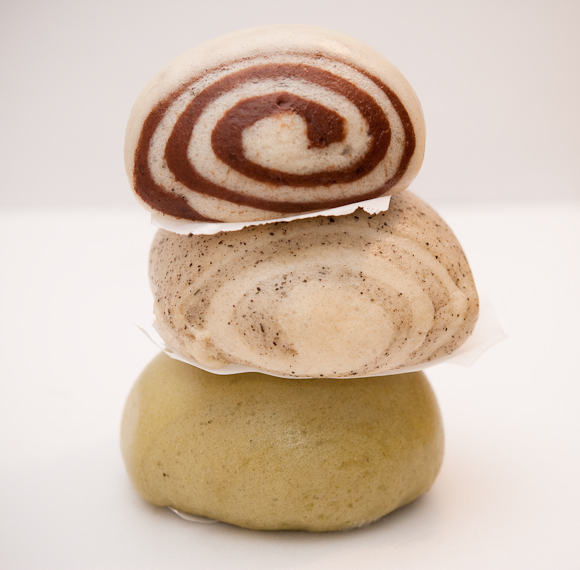
旋風饅頭
10個饅頭
: 老麵 :
中筋麵粉 // 200g
乾酵母粉 // ½ tsp
水 // 100g
鹽 // 1/8 tsp
1. 攪拌均勻至光滑,室溫發酵8小時,取出備用。
2. 老麵可冷藏1~2天或雪藏保存,雪藏可放1個月!
: 饅頭 :
老麵 // 70g
中筋麵粉 // 300g
糖 // 30g
水 // 140g
鹽 // 少許
乾酵母粉 // 5g
牛油 // 2 tsp
豆粉 // 2 tbsp
黑芝麻粉或朱古力粉 // 3 tbsp
1. 將所有材料(除老麵和油外)放入麵包機攪拌至成糰,再加入老麵,混合好後加入油,攪拌至麵糰完全吸收油為止。
2. 將麵糰分割成兩半。一半滾圓覆蓋保鮮膜略為鬆弛一下。另一半麵糰加入匙黑芝麻粉及水,將芝麻粉充份揉入麵糰中,滾圓。覆蓋保鮮膜略微鬆弛一下,發酵20分鐘。
2. 取出麵糰,反覆桿平6次。最後一次,桿平,壓成0.3cm厚. 覆蓋保鮮膜略為鬆弛三分鐘。將黑芝麻麵皮放到白麵皮上,捲起成棍棒狀. 接縫捏緊. 輕輕滾長. 再分割成數份,約短過2"闊度。將分割好的麵糰放在蠟紙上。
3. 第二次發酵40分鐘,約兩倍大。
4. 用中小火蒸約10-13分鐘,熄火再悶2分鐘才取出。
Friday, November 13, 2009
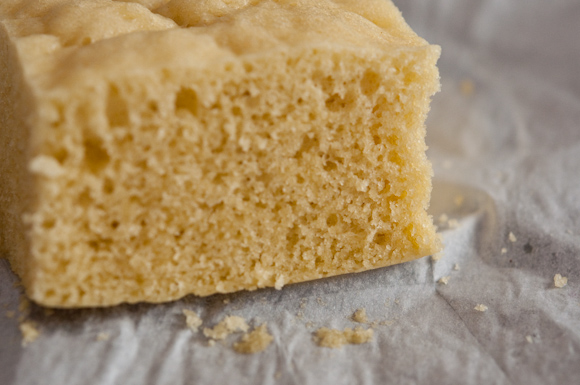
Steamed goodies: gluten-free & vegan pumpkin rice cake 南瓜鬆糕
小時候很不喜歡南瓜,覺得怪怪的,但近年反而愛上了呢!不過大多時候都是買日本的栗子南瓜,貪其小巧,一個人也吃得完。每次處理南瓜都不外乎是麵豉炒肉片南瓜,南瓜粥,南瓜麵包/饅頭。Super baking mode爆發完了,duper steaming mode啟動!
Hmmm...這個鬆糕很好吃呢!看上去好將有點乾,但吃下去一點都不乾喔!鬆軟香糯,中間夾著的一層南瓜泥有畫龍點睛的感覺呢!材料超簡單(還很有益,沒油沒蛋喔!),做法也不難,冬天吃暖呼呼的糕點最幸福了!
這南瓜鬆糕意外地受我的同事歡迎,一下字就分完了!南瓜鬆糕
6" 小圓模
Recipe revised from 南瓜鬆糕
糯米粉 // 80g
粘米粉 // 80g
南瓜泥 // 150g
糖粉 // 20g
1. 把粘米粉、糯米粉、糖粉拌勻,逐少倒入南瓜泥(多小看情況而定,因為蒸出來的水份每次都不一樣),拌成半濕狀態,用雙手揉成潮濕但仍鬆散的粉粒,再過篩2次成細粉末狀。
2. 模具內部四周用油擦過,放入一層細粉,鋪平,放入窩蒸5分鐘,取出。中間小心鋪上一層南瓜泥中間。再倒入餘下的細紛,刮平表面(不要壓,保持鬆散狀),放入鍋中,表面蓋布,大火蒸20分鐘。
:notes:
1/ 保存時表面蓋上保鮮紙以放乾硬。冷了或雪過的鬆糕必須翻蒸加熱。
2/ 那些啡色一點店是因為我加了點帶皮杏仁粉(因為快過期了!)
Wednesday, November 11, 2009
chestnuts fever ll: Chestnut stewed chicken + roasted candied chestnuts + chestnuts matcha roll
栗子狂熱(中式篇): 栗子炆雞 + 糖炒栗子 + 抹茶栗子卷
Chinese edition of chestnuts fever!
roasted chestnuts with sugar 糖炒栗子 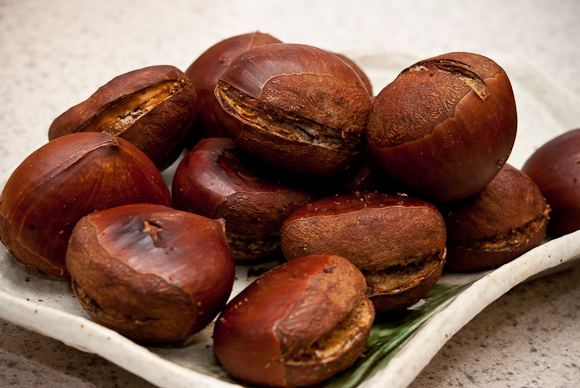
Roasted chestnuts is probably the most popular snack in winter. The chestnuts are roasted by heated black sand and sugar in a large wok. It used to be a very common street vendor during the cold season. It's usually roasted by machine nowadays.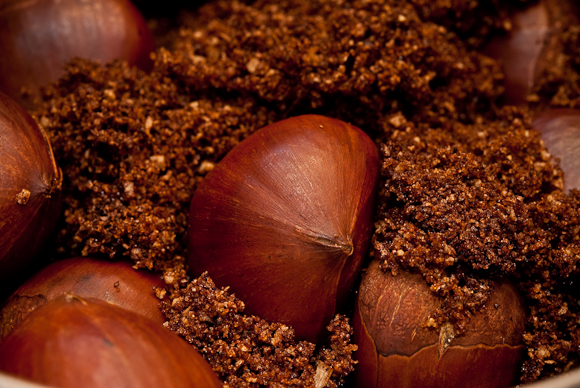
And of course I do not have black sand, used sea salt instead, looks kinda real, huh?
chestnut stewed chicken 栗子炆雞 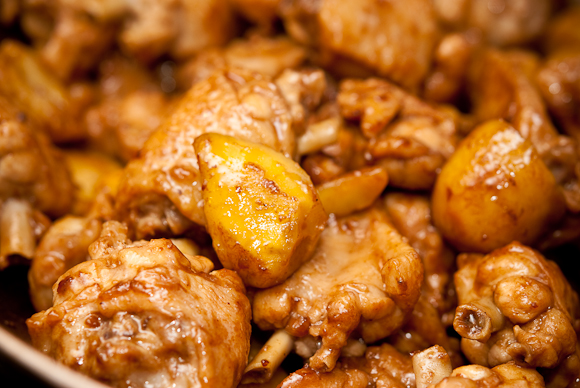
If you are talking about chestnut dish, chestnut stewed chicken will first pop in every Chinese' mind immediately. It's just like tomato and basil for Italians!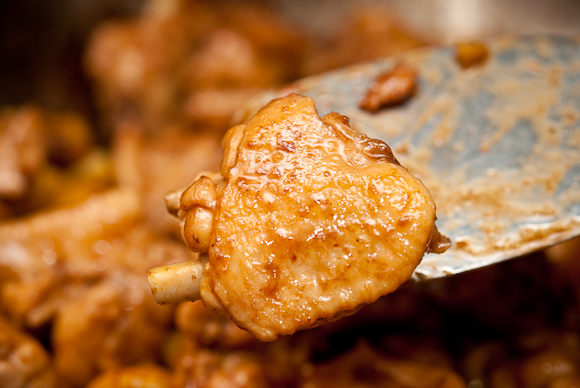
chestnut stewed chicken
2 servings
Chicken wings/drumstick// 1/2 lb
Chestnuts // 10
Chu hou paste // 2 tbsp
Oyster sauce // 1 tsp
Sugar // 1 tsp
Ginger // 1 slice
Garlic, mashed // 1 tsp
1. Wash chicken wings and tights, pat dry and cut into pieces(usually in halves). Put chestnuts in a saucepan with simmering water for 10 minutes, turn off heat and cover for another 10 minutes. Strain through sieve and soap the chestnuts in cold water. Remove the shell and inner skin one by one.
2. Place the wok over medium heat, add some oil, cook until very hot. Put in the ginger and garlic, then the other seasoning. Add chicken to the wok and stir fry until golden in color. Add in chestnuts, stir occasionally. Add water, just to the level that covers all the ingredients, turn to high heat until water simmer. Cover and turn to med-low heat, cook until chicken is done and water reduced to sauce-like consistency.
:notes:
1. For Chu hou paste, you should able to find it in Asian markets, or you can replace it with bean sauce, garlic, and ginger. Look for Lee Kam Kei brand, the can should look like this:
2. To chop the chicken wings and drumstick into pieces, you need a very sharp knife and cut it through in one harsh chop; or you can debone the big bone before cutting them into pieces. I deboned the drumsticks and chopped the chicken wings into halves.
Just like what Yujai's dad always say: Your knife is not sharp enough for cutting chicken, meat or anything, but your finger! Be careful!栗子炆雞
2位用
雞翼/雞鎚 // 1/2 lb
栗子 // 10粒
柱候醬 // 2 tbsp
蠔油 // 1 tsp
糖 // 1tsp
薑 // 1片
蒜頭,拍扁 // 1 tsp
1. 雞翼/雞鎚洗凈斬件,栗子水滾煮10分鐘,熄火焗約10分鐘, 將栗子放進凍水中慢慢去殼去衣。
2. 鑊熟落油,滾油爆香薑和蒜蓉,再下其他醬料,放雞件炒至金黃色。下栗子炒勻,加水至蓋過所有材料,大火煮滾後,蓋鑊蓋慢火炆約20分鐘至雞熟及收汁即可。
:notes:
通常雞脾大骨不一刀斬斷,雞脾骨便會碎。斬雞需磨利把刀,用重力一刀過斬下,或可先將雞脾大骨起出才斬。我直接將所有雞鎚去骨,雞翼則斬件,就沒有碎骨的問題了 ;p
魚爸爸有云:”你把刀斬雞斬肉斬什麼都不夠鋒利,但斬手指就利得很!”
敬請各位小心!
Chestnuts matcha roll 抹茶栗子卷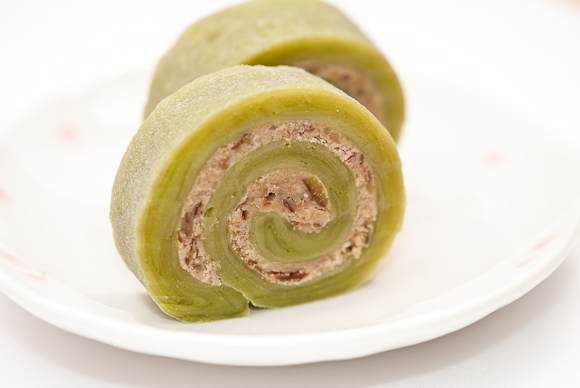
香蕉糕變奏版 XD
Gluten-free chestnuts matcha roll: This is a variation of the classic Chinese banana red bean roll using glutinous rice flour. I mix the matcha powder to the glutinous rice flour and use chestnut paste instead of red bean paste :)Chestnuts matcha roll
冰皮綠茶卷by小三看天下
Glutinous rice flour, cooked // 150g
Powdered sugar // 200g
Cool cooked water //300g(depends on the situation)
Oil or butter // 35g
Matcha powder // 1 tsp
1. Place the glutinous rice flour into a saucepan over low heat, stir fry (with no oil) until the color turned very light amber or when you can smell the rice scent.
2. Mix together glutinous rice flour, powdered sugar and matcha powder. Form a flour well and slowly pour in water (little bit at a time), until it form a workable but moist dough. Add in butter and work until completely incorporated. Chill in refrigerator for 15 minutes.
3. Place a plastic warp on the working surface, sprinkle some glutinous rice flour, place the matcha dough, place another piece of plastic wrap on the top and roll it out into rectangular shape. Same as the fillings, but a little smaller than the matcha dough.
4. Remove the top plastic warp, place filling sheet on top the matcha dough sheet. Roll them together and form a swirl roll. Cut and serve immediately.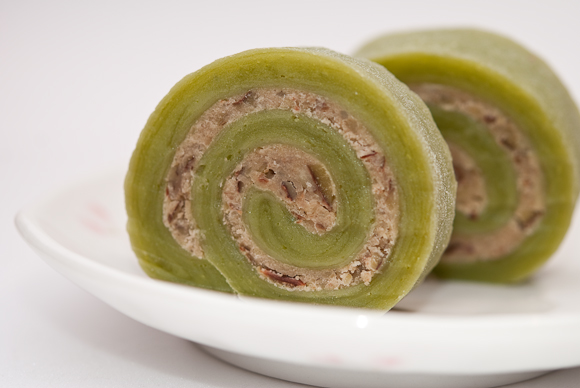
抹茶栗子卷
冰皮綠茶卷by小三看天下
糕粉 // 150g
糖粉 // 200g
凍滾水 //300g(要看情況加減份量)
生油或牛油(室溫) // 35g
綠茶粉 // 1 tsp
1. 糕粉、糖粉與綠茶粉混合,中間開一穴,慢慢加入凍滾水搓勻,再加入牛油搓揉,放入雪櫃冷凍約15分鐘成冰皮。
2. 在桌面舖上保鮮紙,灑上糕粉,取出適量冰皮攤平,在冰皮面舖上另外一張保鮮紙,再用木棍輾薄,餡料做法一樣但不需灑上糕粉,大小比冰皮細些。
3. 取出向上的保鮮紙,將餡料舖在冰皮面,用舖低的保鮮紙輔助,慢慢由內向外捲成長條,分切小塊,大小隨意,放入雪櫃雪凍,即可。
Saturday, November 07, 2009
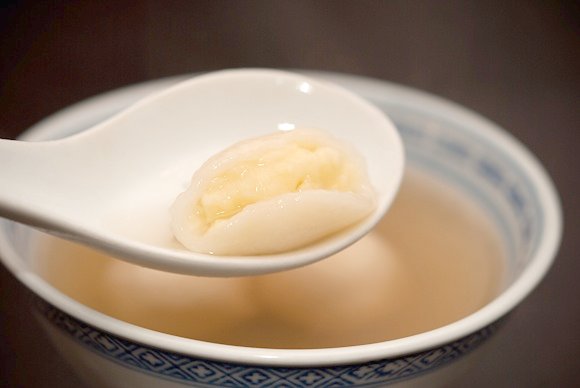
Mooncake leftovers: Tong yuen (Chinese sweet dumplings)
月餅餡消耗戰: 湯圓
Another quick and dirty way to use up the mooncake fillings....sweet dumplings!
Tong yuen (or Tāngyuán in Mandarin) is a Chinese dessert made from glutinous rice flour. Glutinous rice flour is mixed with water to form balls and then cooked and served in boiling water. Tangyuan can be either small or large, and filled or unfilled, sweet or savory. It is traditionally eaten during Yuanxiao, or the Lantern Festival. 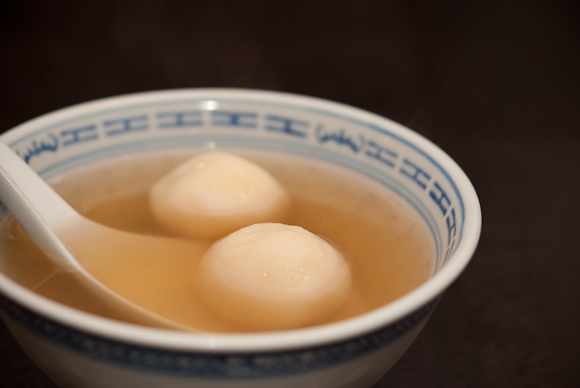
Chinese sweet dumplings
芝麻湯圓 by Eupho Cafe
:dough:
Glutinous rice flour // 4 cup
Hot water // 220 ml
Cool water // 200 ml
1. Divide the fillings and form into balls. Chill in the refrigerator (or chill the dough first, then shape into balls and send it back to refrigerator again).
2. Divide the ingredients in equal halves to prevent the dough dry out. Mix glutinous rice flour into the 110 ml hot water, use chopsticks to mix until part of the flour becomes dough-like, pour in 100ml cool water to form the dough. Once the temperature decrease and becomes touchable, work the dough with hands. Divide dough into 20g small balls, press the top to create a bowl shape, add in the filling, cover and shape into balls.
3. Boil water in a saucepan, put in sugar (preferably rock sugar or raw sugar) and a small piece of ginger. Slowing add in tong yuen when the water is simmering. Cook for 10 minutes or until tong yuen is soften.
:notes:
1. I always have some tong yuen in the freezer, it's a quick and easy dessert for everyday cooking! My family likes cook together yam, ginger, raw sugar and tong yuen, it's a good way to get warm up :)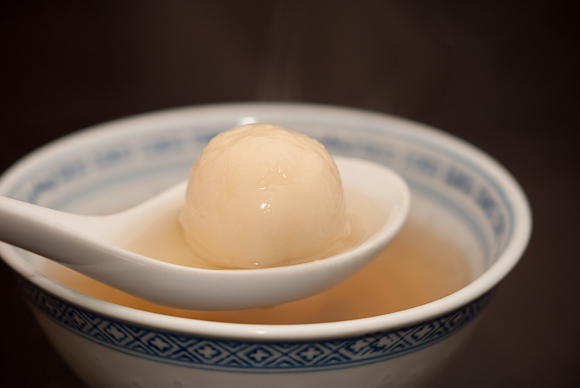
湯圓
芝麻湯圓 by Eupho Cafe
:皮料:
糯米粉 // 4 cup
滾水 // 220 ml
冷水 // 200 ml
1. 將餡料分成一個個小團,儘量調整成圓球狀,然後放進冰箱冰硬(也可以冰到略硬時,取出揉圓再冰到變硬)。
2. 為了避免皮變硬,可以將皮的材料分成兩半,先做一半,包好再做另一半。將糯米粉2杯調入滾水110 ml,用筷子攪拌,使部分糯米粉變成團狀,然後加入冷水100 ml攪拌成團,溫度降低後,用手揉成軟麵團。分割每個小團約重20g,輕壓出一個凹槽,填入餡料、收口、搓圓即可。
:notes:
1. 做多一點冰起來也沒關係,湯圓是快靚正的看門口甜品呢!我家喜歡用蕃薯,薑,片糖和湯圓一起煮,吃過後暖笠笠好滋味!(蕃薯下少許就夠了,否則會很滯的!)
Tuesday, October 27, 2009
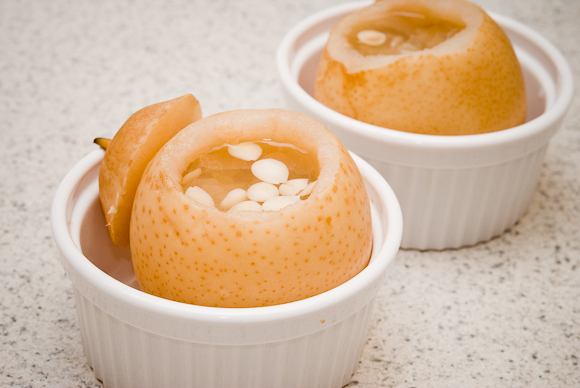
Stewed Pear with White Fungus and Rock Candy 杏汁冰糖燉雙雪
Pear is one of my favourite fruits! I guess I just love everything that's have a crunchy texture. It's juicy, refreshing and most importantly, available all year around and not expansive.
Among all regional varieties of Chinese cuisine, Cantonese cuisines is probably the most renowned for food therapy using causal ingredients in day-to-day dishes. In simple terms, it is all about eating the right food at the right time and make the food delicious and pretty. In Chinese, it is called "不時不食", means "eat with the season", eat most foods only when they are in season.
The most well known example would be slow cooked soup and sweet soup. Cantonese food therapy is always about soup. Herbal soup for fall/winter to moisturize your body whereas veggie soup for calming your body during the heatwave in summer.
Pear(I especially mean Asian pear, the ones with yellow skin), is an excellent example of the Cantonese cuisine theory. Although you see them all year round, they naturally harvest in fall.
This dessert is served warm. Especially good for ones who is suffering from coughing and dry throat. You will feel this smooth sweet pear soup with the hint of apricot kernels scent slowly calm the dry throat and warm your stomach. It also helps to moisturize your skin.
Take care and keep healthy!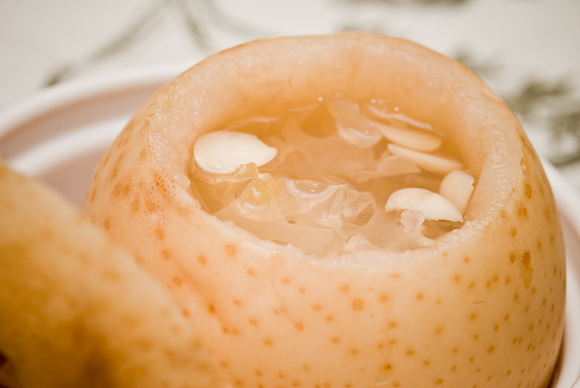
Stewed Pear with White Fungus and Rock Candy
2 servings
Apricot kernels // 2 tsp
Water // 2 cup
Rock candy // 1 tbsp
White fungus (optional) // 2 tbsp
Asian pear // 2
1. Wash the apricot kernels and pat dry. Place in a small pan over low heat to toast (or you can use the oven, just like how to toast nuts), until slightly golden on the edge or you can smell the scent.
2. Meanwhile prepare the pear bowls. Use an apple Corer to core, and carefully scoop out the fruits without breaking it. Save the fruits for next step.
3. Pour the water into a small pan over medium heat, bring it to boil. Add in kernels and fruits, simmer for 20 minutes over medium-low heat. Add in rock sugar in last 5 minutes.
4. Discard the fruits from the sweet water. Pour the sweet water(along with the kernels and white fungus) into the pear bowls. Place them in the steamer over low heat for another 30 minutes.
:notes:
1. Don't scared by the name white fungus. It is a very common ingredients in Chinese food therapy with the use of smoothing and moisturizing. Just think about mushroom, it's like the cousin of mushrooms ;)
2. I'd like to discard the fruits from the soup because of the pear bowl size and also it loses the texture after the simmering process. It's up to you to keep them or not.杏汁冰糖燉雙雪
2位用
南北杏 // 2 tbsp
雪耳(可不加) // 2 tbsp
冰糖 // 1 tbsp
水 // 2 cup
雪梨 // 2
1. 洗淨南北杏,白鑊炒香備用。
2. 雪梨先用去核器挖芯,再慢慢挖空成梨盅。留下梨肉備用。
3.小鍋中放雪耳,梨肉,南北杏和水,煲20分鐘。最後5分鐘放入冰糖煮溶。
4. 隔起梨肉。煮好的糖水連同南北杏和雪耳倒入梨盅內,小火燉30分鐘即可。
:notes:
1. 我喜歡隔起梨肉因為梨盅很小而且煲過後已失口感。這就個人喜好留下亦未嘗不可。
Thursday, October 22, 2009
Mooncake leftovers: Coconut and osmanthus jelly
月餅餡消耗戰: 桂香白雪千層
Time to use the leftover coconut milk!
Only tiny bit of the coconut milk was used for the mooncake fillings, so I almost have a full can to play with. Making coconut jelly would be the only way to KO it! (Oops....too much street fighter lately)
Once again, I admit I am a weirdo. I love desserts with coconut milk, but I just hate hate hate(Bet you can tell how much I hate from the repeated word) coconut flakes. I always scrap the flakes whenever I see them.
桂香白雪千層...本來,但計錯數變成桂香白雪三層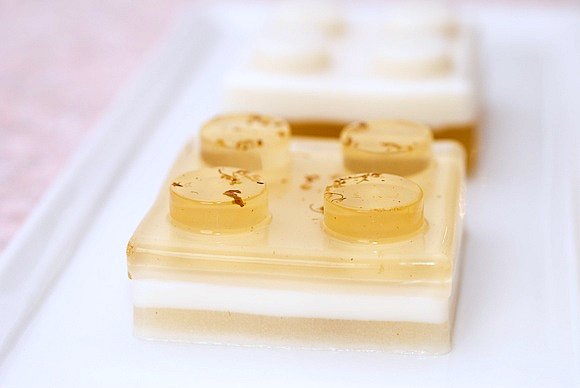
Coconut and osmanthus jelly
6 servings, 3"x3"
revised from 吳志恆師傅: 桂香雪白千層
: Coconut jelly :
Water, hot // 400ml
Gelatine // 30g (roughly 4 packs)
Sugar // 78g
Whipping cream // 70ml
Coconut milk // 200ml
: Osmanthus jelly :
Water, hot // 250ml
Water, cool // 200ml
Gelatine // 21g (rounghly 3 packs)
Sugar // 80g
Osmanthus sugar // 1tbsp (Can buy it from Ranch99)
Coconut jelly:
1. Combine gelatine and sugar, pour in hot water until dissolved(Sit over hot water can help to speed up the process).
2. Pour in whipping cream and coconut milk, do not beat (avoid bubbles).
3. Pour into the pan to let cool, then refrigerate for 30 minutes.
Osmanthus jelly:
1. Combine gelatine and sugar, pour in hot water until dissolved(Sit over hot water can help to speed up the process).
2. Add in osmanthus sugar, stir well. Pour in cool water.
3. Pour slowly on the already chilled coconut jelly, refrigerate.
4. Repeat for several layers as you like.桂香白雪千層
6人份 3"x3"
修改自吳志恆師傅: 桂香雪白千層
: 椰汁糕 :
熱水 // 400ml
魚膠粉 // 30g
糖 // 78g
淡忌廉 // 70ml
椰汁 // 200ml
: 桂花糕 :
熱水 // 250ml
凍水 // 200ml
魚膠粉 // 30g
糖 // 80g
桂花糖 // 1tbsp
椰汁糕做法 :
1. 將魚膠粉加糖混合,加入熱水拌勻至完全溶解。(可坐熱水加快溶解)
2. 加入淡忌廉及椰汁拌勻,不要打至起泡。
3. 倒入糕盆中放涼後,放入雪櫃內雪約30 分鐘。
桂花糕做法 :
1. 將魚膠粉加糖混合,加入熱水拌勻至完全溶解。(可坐熱水加快溶解)
2. 將桂花糖加入拌勻後,再加入凍水拌勻。
3. 慢慢倒入以凝固之椰汁糕上,放入雪櫃內凝固。
4. 可重複以上步驟做出有多層效果。
Subscribe to:
Posts (Atom)